|
|
|
 |
|
|
| ************************************************************************************************* |
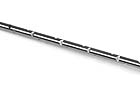
| Tool detail |
(click to enlarge) |
| The tool is specially designed and hand groung to create sharp micro scurfies on the surface of the tool pin to precisely size plastic without tearing, stressing or over-sizing the hole of the suspension arm. |
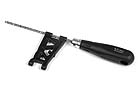
| How to use |

(click to enlarge) |
| 1. Insert the head of the tip into the suspension arm hole, then smoothly and gently push inward while rotating. |
|
(click to enlarge) |
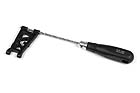
| 2. Continue pushing the tool though the hole until you reach the tool handle. |
|
(click to enlarge) |
| 3. Slowly reverse direction and pull out the tool while rotating. You will now have a perfect, non-binding suspension arm. |
|
|
|
|